Author Archives: om

Cesium – How to show multiple polylines using czml ?

var czml = [
  {
    "id" : "document",
    "name" : "CZML Geometries: Polyline",
    "version" : "1.0"
  },
  {
    "id" : "redLine",
    "name" : "Red line on the surface",
    "polyline" : {
      "show": false,
      "positions" : {
        "cartographicDegrees" : [
          -75, 35, 0,
          -125, 35, 0
        ]
      },
      "material" : {
          "polylineOutline": {
              "color": {"rgba": [255, 0, 0, 255]},
              "outlineColor": {"rgba": [255, 255, 255, 255]},
              "outlineWidth": 2.0
          }
      },
      "width" : 5
    }
  },
  {
    "id" : "purpleLine",
    "name" : "Purple straight line at height",
    "polyline" : {
      "show": false,
      "positions" : {
        "cartographicDegrees" : [
          -125, 35, 0,
          -170, 35, 0
        ]
      },
      "material" : {
          "polylineOutline": {
              "color": {"rgba": [148, 0, 211, 255]},
              "outlineColor": {"rgba": [255, 255, 255, 255]},
              "outlineWidth": 2.0
          }
      },
      "width" : 5
    }
  }
];

var viewer = new Cesium.Viewer('cesiumContainer');
var dataSource = new Cesium.CzmlDataSource();
dataSource.load(czml);
viewer.dataSources.add(dataSource);
viewer.zoomTo(dataSource);

var handler = new Cesium.ScreenSpaceEventHandler(viewer.scene.canvas);
handler.setInputAction(
    function () { 
        dataSource.entities.getById('purpleLine').polyline.show = true;
        dataSource.entities.getById('redLine').polyline.show = true;

    },
    Cesium.ScreenSpaceEventType.LEFT_CLICK
);

By : https://github.com/AnalyticalGraphicsInc/cesium/issues/3598

Share

Cesium – How to make an InfoBox pop up on demand ?

                              .....
                           .'       '.
                          .           .
                          :           :
                          '           '
                ,.*====.   '.       .'   .====*.,
               .-`"/c)}}},    :...:    ,{{{(c\"`-.
           _.-'-6>   {{{{{'''`     `'''}}}}}   <9-'-._
          t         |}}}}}}           {{{{{{|         y
           \__.___.'{{{{{{{           }}}}}}}'.___.__/
               `[__/}}}}}}}}         {{{{{{{{\__]`
                {{{.'     `'-._   _.-'`     '.}}}
                }}/            ```            \{{
                {{|                           |}}
                }}|                           |{{
         .------{{{\    ,               ,    /}}}------.
        //.--------'    ;               ;   '---------.\\
       ((///  _          \             /          _  \\\))
 jgs    (((--' `''-------'`'"'-----'"'`'-------''` '--)))

It’s a bit of a hack, but you can make the info popup display whatever you like by creating a fake entity and setting it as the viewer’s selected entity. For example:

var entity = new Cesium.Entity('Title to put in the infobox');
entity.description = {
    getValue : function() {
        return 'HTML to display in the infobox';
    }
};
viewer.selectedEntity = entity;
Share

Cesium – How to Improve InfoBox ?

In order to run a script in the infobox, you have to enable scrips to run in the iframe. This is disabled by default for security reasons, in case you don’t know the source of the data populating the infobox.
You can enable scrips with this code:

var iframe = document.getElementsByClassName('cesium-infoBox-iframe')[0];
iframe.setAttribute('sandbox', 'allow-same-origin allow-scripts allow-popups allow-forms'); 

Also, to get the current value of an entity property, you can use .getValue(viewer.clock.currentTime);

Share

Cesium – How to show tooltip in cesium ?


Share

How do I find ElasticSearch path to install plugins?

This is for new ElasticSearch user.

If you have installed elastic search and unable to install plugins, here are the easy steps.

1. Type this command

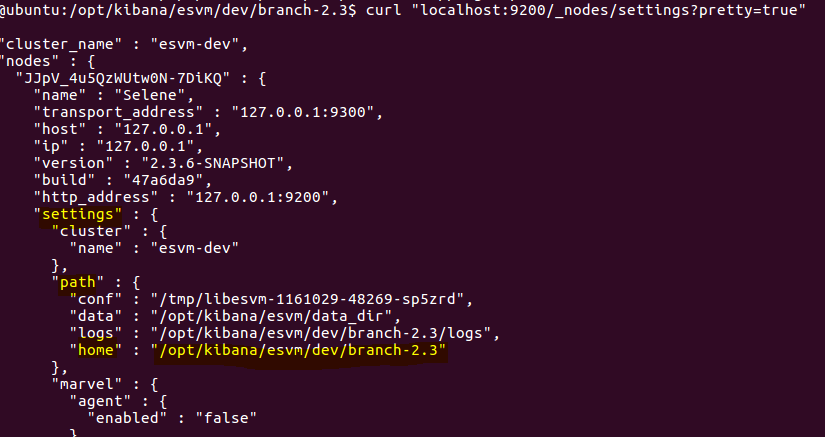
$ curl "localhost:9200/_nodes/settings?pretty=true"

elasticsearch-plugin

Locate your home directory ( Look for Settings -> Path -> Home for value )
2. Go to Location (Example on the picture above)

 cd /opt/kibana/esvm/dev/branch-2.3" 

Install Plugin (Example plugin: mobz/elasticsearch-head)

 sudo bin/plugin install mobz/elasticsearch-head

If you are using old elasticSearch use "-install" instead of just install

I have ES 2.1.0 and the command is : sudo bin/plugin install mobz/elasticsearch-head  for me

How to test –

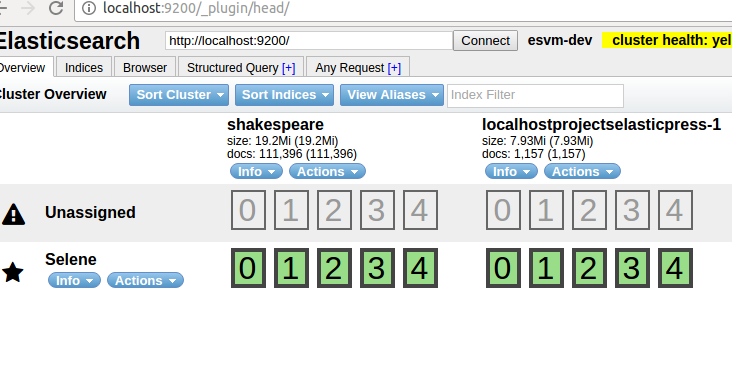
Open this URL

http://localhost:9200/_plugin/head/

If you see this, your plugin is working.
phpmind-elasticsearch-head-plugin

similarly, you can install other plugins –

sudo bin/plugin install https://github.com/AIsaac08/bigdesk/archive/master.zip

Command which is given in the site is not working on 29th of Nov 2015 


About BigDesk Plugin phpmind-elasticsearch-bigdesk-plugin

How to test – http://localhost:9200/_plugin/bigdesk/

phpmind-elasticsearch-bigdesk-plugin-test

kopf is a simple web administration tool for elasticsearch written in JavaScript + AngularJS + jQuery + Twitter bootstrap

How to install –

<pre>sudo bin/plugin install https://github.com/lukas-vlcek/bigdesk/archive/master.zip</pre>

phpmind-elasticsearch-kopf-plugin


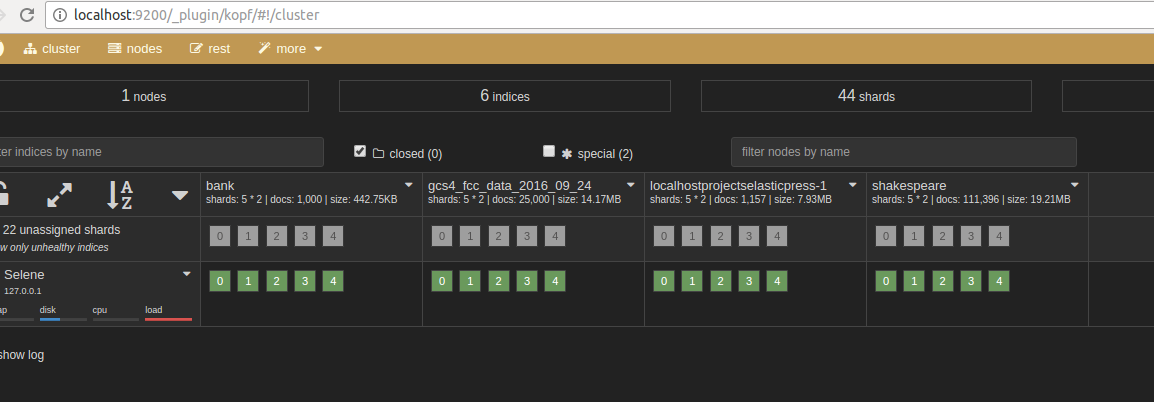
How to test –  http://localhost:9200/_plugin/kopf

phpmind-elasticsearch-kopf-plugin-test

About  koph 

Share

How to access external data from Kibana Plugin?

phpmind-kibana-image

To make AJAX call from Kibana Visualization to external web service.

 $.ajax({
     type: "GET",
     url: 'http://localhost/es',
     headers: {'Content-Type':'application/x-www-form-urlencoded'},
     success: function(my_result) {
          console.log(my_result);
     },
     error: function() {
          alert("error1");
     },
});

There are two separate headers that are necessary here: access-control-allow-origin and access-control-allow-headers. You’re currently setting access-control-allow-origin but I don’t see anywhere you’re setting access-control-allow-headers.


Share

How to make download file forcefully and securely ?

#   _____ ____  ____  ____  _____   ____  ____  _      _      _     ____  ____  ____ 
#  /    //  _ \/  __\/   _\/  __/  /  _ \/  _ \/ \  /|/ \  /|/ \   /  _ \/  _ \/  _ \
#  |  __\| / \||  \/||  /  |  \    | | \|| / \|| |  ||| |\ ||| |   | / \|| / \|| | \|
#  | |   | \_/||    /|  \_ |  /_   | |_/|| \_/|| |/\||| | \||| |_/\| \_/|| |-||| |_/|
#  \_/   \____/\_/\_\\____/\____\  \____/\____/\_/  \|\_/  \|\____/\____/\_/ \|\____/
#

Warning – Be careful with this script i have modified this just for me but you can use it anyways.

 'pass_protected/myfile_02.zip',
	'2_docs' => 'pass_protected/myfile_32.zip',
	'2_js' => 'pass_protected/my_docs.zip'
);


$file_name = $_GET['file'];
$file_name = isset($zip_files[$file_name]) ? $zip_files[$file_name] : null;
$file_name = $file_name ? Config::ABS_PATH . $file_name : null;

if (!$file_name) {
	exit();
}


// make sure it's a file before doing anything!
if(file_exists($file_name)) {

	/*
		Do any processing you'd like here:
		1.  Increment a counter
		2.  Do something with the DB
		3.  Check user permissions
		4.  Anything you want!
	*/


	// required for IE
	if(ini_get('zlib.output_compression')) { ini_set('zlib.output_compression', 'Off');	}

	// get the file mime type using the file extension
	switch(strtolower(substr(strrchr($file_name, '.'), 1))) {
		//case 'pdf': $mime = 'application/pdf'; break;
		case 'zip': $mime = 'application/zip'; break;
		//case 'jpeg':
		case 'jpg': $mime = 'image/jpg'; break;
		default: $mime = 'application/force-download';
	}
	header('Pragma: public'); 	// required
	header('Expires: 0');		// no cache
	header('Cache-Control: must-revalidate, post-check=0, pre-check=0');
	header('Last-Modified: '.gmdate ('D, d M Y H:i:s', filemtime ($file_name)).' GMT');
	header('Cache-Control: private',false);
	header('Content-Type: '.$mime);
	header('Content-Disposition: attachment; filename="'.basename($file_name).'"');
	header('Content-Transfer-Encoding: binary');
	header('Content-Length: '.filesize($file_name));	// provide file size
	header('Connection: close');
	readfile($file_name);		// push it out
	exit();

}

?>
Share

How protect files using php and .htaccess ?

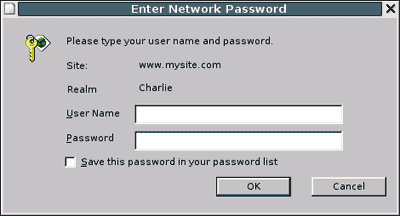
phpmind-password-dialog

htaccess-logo
You can secure any file using this script.
It will not allow you to access without username and password.

1st step is to create .htaccess file in a folder which you want to protected.
2nd step is add index.php as shown in example. This will not work as it is but you can modify.

/*******************************************************/


.htaccess file

/********************************************************/

Options -Indexes 

RewriteEngine On

RewriteCond $0 !^(favicon\.ico|favicon\.png|media|robots\.txt|crossdomain\.xml|css|js)

RewriteRule .* index.php?file=$0 [QSA,L] # pass everything thru php


Share