Author Archives: om

How to use PHP to output an mp4 video ?

phpmind-mp4
I want my videos URL to keep hidden from the users while still, they can able to see the video. 

It have 2 parts.

1. PHP code and
2. HTML video Code

0||$end<$size)
  header('HTTP/1.0 206 Partial Content');
else
  header('HTTP/1.0 200 OK');

header("Content-Type: video/mp4");
header('Accept-Ranges: bytes');
header('Content-Length:'.($end-$begin));
header("Content-Disposition: inline;");
header("Content-Range: bytes $begin-$end/$size");
header("Content-Transfer-Encoding: binary\n");
header('Connection: close');

$cur=$begin;
fseek($fm,$begin,0);

while(!feof($fm)&&$cur<$end&&(connection_status()==0))
{ print fread($fm,min(1024*16,$end-$cur));
  $cur+=1024*16;
  usleep(1000);
}
die();
?>


Share

How to uninstall Elasticsearch and Kibana


phpmind-kibana

(1) Remove previous versions of ElasticSearch:

sudo apt-get --purge autoremove elasticsearch

(2) Remove the ElasticSearch directories:

sudo rm -rf /var/lib/elasticsearch/
sudo rm -rf /etc/elasticsearch

(3) Install ElasticSearch 1.6:

sudo dpkg -i elasticsearch-1.6.0.deb

(4) Start the service:

sudo service elasticsearch start

(5) Test if it works:

sudo service elasticsearch status
curl -XGET "http://localhost:9200/_cluster/health?pretty=true"
curl "localhost:9200/_nodes/settings?pretty=true"


Remove Kibana

Things you can use to resolve this situation:

  1. reinstalling and then removing
    sudo apt-get install --reinstall kibana
    sudo apt-get remove kibana
    
  2. single remove without purge
    sudo apt-get remove kibana
    
  3. force installing and removing
    sudo apt-get -f install
    sudo apt-get remove --purge kibana
    
  4. force removing by dpkg
    sudo dpkg -r --force kibana

How do I determine the total size of a directory (folder) from the command line?

The command du “summarizes disk usage of each FILE, recursively for directories,” e.g.,

du -hs /path/to/directory

How to find the path of the local git repository when I am possibly in a sub-directory?

git rev-parse --show-toplevel

How do I remove a folder?

Be sure the folder is really empty (hidden files/folders might be in there). Look at the file contents again with

sudo ls -lha /path/

If you’re absolutely certain that it doesn’t contain anything you want to have (including subdirectories), delete it with

sudo rm -r -f /path/

The -r makes it delete the folder (and subfolders), even if it is non-empty, -f is for force (this might be unnecessary).

How to know elastic search installed version from kibana?

/opt/kibana/bin/kibana --version

Share

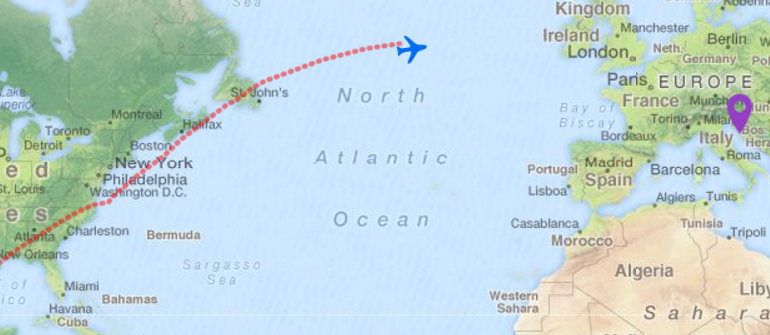
How to rotate flight marker towards arrival airport in leaflet ?


flight_market_heading

First it is important to know how it works –

    1. Check out Leaflet Rotated Marker  plugin https://github.com/bbecquet/Leaflet.RotatedMarker
    2. L.marker([48.8631169, 2.3708919], {
          rotationAngle: 45
      }).addTo(map);


rotationAngle property need a value and this is key. You will have to generate that dynamically based on aircraft position and destination airport.  Function below does the same calculate  and give rotationAngle.

Function in Python

def computeHeading(lat1, long1, lat2, long2):
    import math
    
    rlat1 = math.radians(lat1)
    rlat2 = math.radians(lat2)
       
    dlong = math.radians(long2 - long1)
    
    y = math.cos(rlat2) * math.sin(dlong)
    x = math.cos(rlat1) * math.sin(rlat2) - math.sin(rlat1) * math.cos(rlat2) * math.cos(dlong)
    heading = round(math.degrees(math.atan2(y, x)) + 360, 4) % 360
    
    return heading

Keep in mind that lat1 and long1 are the aircraft’s position. And lat2, long2 are airport destination where aircraft is heading.


Function in PHP

function computeHeading($lat1, $long1, $lat2, $long2) // lat1 and long1 are the aircraft's position
{

    $rlat1 = deg2rad($lat1);
    //$rlat2 = radians($lat2);

    //$rlat1 = radians($lat1);
    $rlat2 = deg2rad($lat2);

    $dlong = deg2rad($long2 - $long1);
    //$dlong = radians(long2 - long1);

    $y = cos($rlat2) * sin($dlong);
    $x = cos($rlat1) * sin($rlat2) - sin($rlat1) * cos($rlat2) * cos($dlong);
    $heading = round(degrees(atan2($y, $x)) + 360, 4) % 360;

    return $heading;

}

Function in JavaScript

  function computeHeading(lat1, long1, lat2, long2)
    {

        // Converts from degrees to radians.
        Math.radians = function(degrees) {
            return degrees * Math.PI / 180;
        };

        // Converts from radians to degrees.
        Math.degrees = function(radians) {
            return radians * 180 / Math.PI;
        };


       var rlat1 = Math.radians(lat1);
       var rlat2 = Math.radians(lat2);

       var dlong = Math.radians(long2 - long1);

       var y = Math.cos(rlat2) * Math.sin(dlong);
       var x = Math.cos(rlat1) * Math.sin(rlat2) - Math.sin(rlat1) * Math.cos(rlat2) * Math.cos(dlong);
       var heading = Math.round(Math.degrees(Math.atan2(y, x)) + 360, 4) % 360;

        return heading;

    }
Share

How to display two table columns per row using javascript ?


Share

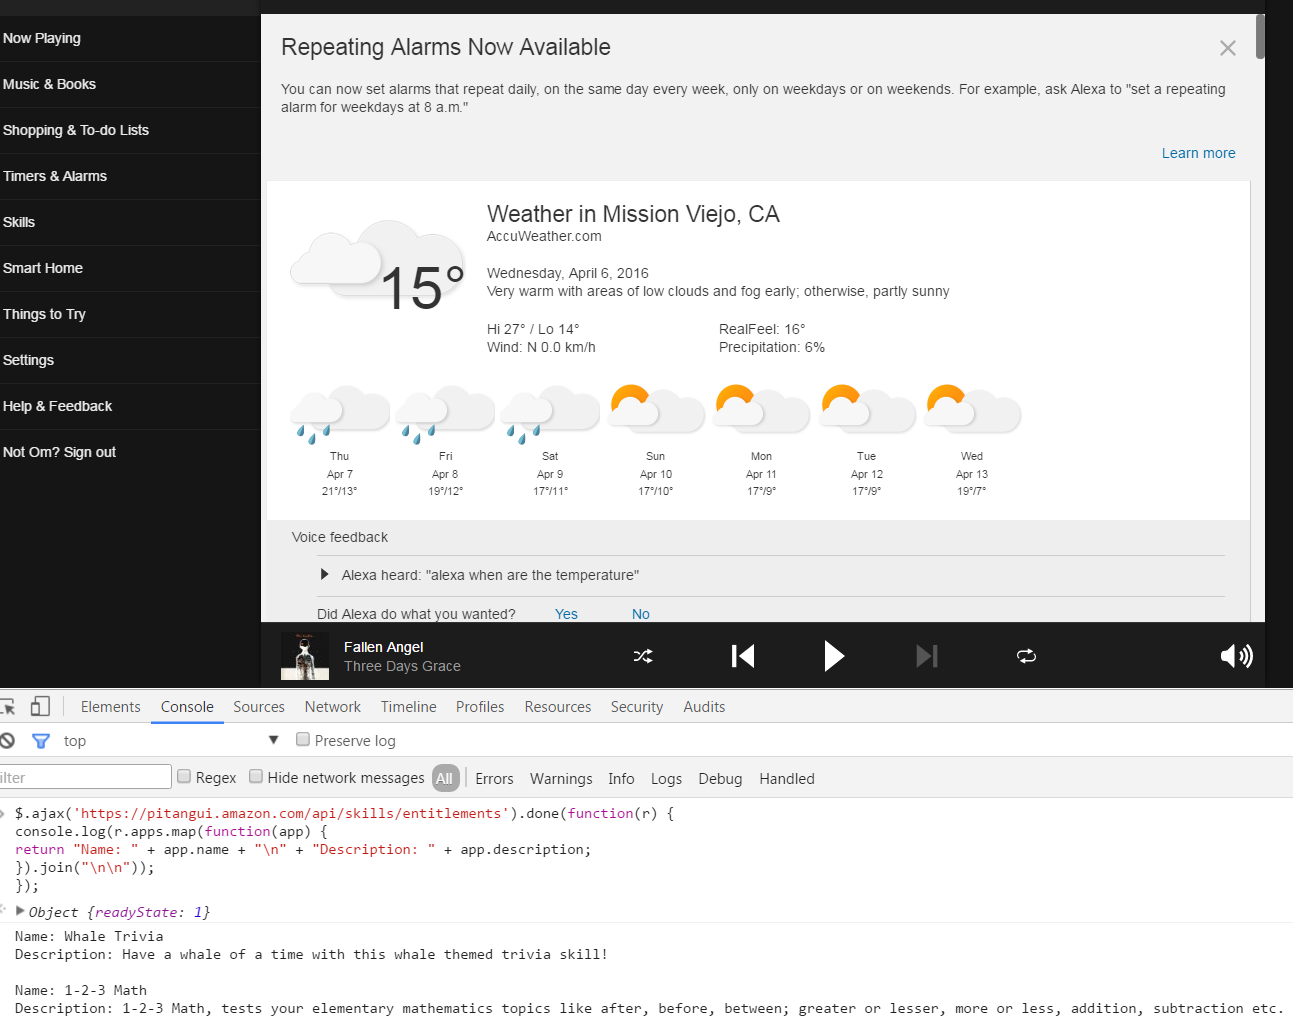
Online list of Echo Skills.

phpmind-echo-skills

Go to alexa.amazon.com, open up the console, and run

<pre>

$.ajax(‘https://pitangui.amazon.com/api/skills/entitlements’).done(function(r) {
console.log(r.apps.map(function(app) {
return “Name: ” + app.name + “\n” + “Description: ” + app.description;
}).join(“\n\n”));
});

</pre>

Share

Node Rest Client

Making REST calls
Each API call takes a set of data in JSON format and returns data also in JSON format. The exception to this is a GET request, which instead takes its data as a query string. I didn’t want to have to deal with this detail, so I cobbled together a wrapper function that would produce data in the correct format and issue the request.

var querystring = require('querystring');
var https = require('https');

var host = 'www.thegamecrafter.com';
var username = 'JonBob';
var password = '*****';
var apiKey = '*****';
var sessionId = null;
var deckId = '68DC5A20-EE4F-11E2-A00C-0858C0D5C2ED';

function performRequest(endpoint, method, data, success) {
  var dataString = JSON.stringify(data);
  var headers = {};
  
  if (method == 'GET') {
    endpoint += '?' + querystring.stringify(data);
  }
  else {
    headers = {
      'Content-Type': 'application/json',
      'Content-Length': dataString.length
    };
  }
  var options = {
    host: host,
    path: endpoint,
    method: method,
    headers: headers
  };

  var req = https.request(options, function(res) {
    res.setEncoding('utf-8');

    var responseString = '';

    res.on('data', function(data) {
      responseString += data;
    });

    res.on('end', function() {
      console.log(responseString);
      var responseObject = JSON.parse(responseString);
      success(responseObject);
    });
  });

  req.write(dataString);
  req.end();
}

https://rapiddg.com/blog/calling-rest-api-nodejs-script

https://www.npmjs.com/package/node-rest-client

Share

Cesium – AJAX to update InfoBox ?


var viewer = new Cesium.Viewer('cesiumContainer');
var scene = viewer.scene;

var handlerA = new Cesium.ScreenSpaceEventHandler(scene.canvas);
  handlerA.setInputAction(function(click) {
    var pickedObject = scene.pick(click.position);
    if (Cesium.defined(pickedObject)) {
      $.ajax({

        type: 'GET',
        url: 'InfoBox.php',
        data: (pickedObject.id.id).val(),

        success: function(result) {
          pickedObject.id.description = "The temperatur of " + result.town + " is " + result.temp + " degrees...";
        }
      }); 
    }
  }, Cesium.ScreenSpaceEventType.LEFT_CLICK);

pickedObject.id is the entity.

Share

cesium – Updating a CZML ‘description’ upon opening the InfoBox ?

updating-CZML-description

var viewer = new Cesium.Viewer('cesiumContainer');
var scene = viewer.scene;

//------ create CZML ------

var czml = 
 [{"id" : "document",
 "version" : "1.0"
 },{"id" : "Boston",
 "label":{"text":"Boston"},
 "position":{"cartographicDegrees":[-71.0589,42.3601,0]},
 "description":"Boston is a city...",
 },{"id" : "New York City",
 "label":{"text":"New York"},
 "description":"New York is a city...",
 "position":{"cartographicDegrees":[-74.0059,40.7127,0]},
 }];

var promise = Cesium.CzmlDataSource.load(czml);
promise.then(function(dataSource) {
 viewer.dataSources.add(dataSource);

   //------ Get the array of entities
 var entities = dataSource.entities.values;
   //------ Loop entities
   for (var i = 0; i < entities.length; i++) {
     var entity = entities[i];
     var name = entity.label;
     entity.label.translucencyByDistance = new Cesium.NearFarScalar(100000,1.0,500000,0.0);
   }
}).otherwise(function(error){
   //------ Display error
 window.alert(error);
});

    //------ Use SSEH to update to current description

var handler = new Cesium.ScreenSpaceEventHandler(scene.canvas);
handler.setInputAction(function(click) {
  var pickedObject = scene.pick(click.position);
  if (Cesium.defined(pickedObject)) {

    pickedObject.id.description =  'The current temperature is...';
   }
}, Cesium.ScreenSpaceEventType.LEFT_CLICK);    

Setting the description property should update it.  Here is an example:


var handler = new Cesium.ScreenSpaceEventHandler(scene.canvas);
handler.setInputAction(function(click) {
    var pickedObject = scene.pick(click.position);
    if (Cesium.defined(pickedObject)) {
        pickedObject.id.description = 'New description';
    }
}, Cesium.ScreenSpaceEventType.LEFT_CLICK);


pickedObject.id is the entity.
Share

cesium – How to enable javascript in InfoBox ?

phpmind-cesiumjs-show-name

The InfoBox does indeed run in an iframe for security and sanitation purposes. You can remove all restrictions by calling the below line of code after creating the view:

viewer.infoBox.frame.removeAttribute('sandbox');

Only do this if you are in complete control of the data that will be loaded into the InfoBox, otherwise it is a security issue.

You can style the infoBox just as easy by injecting any css you want into the viewer.infoBox.frame for example:

            var cssLink = frameDocument.createElement("link");
            cssLink.href = buildModuleUrl('Path/To/Your/CSS/File.css');
            cssLink.rel = "stylesheet";
            cssLink.type = "text/css";
            viewer.infoBox.frame.contentDocument.head.appendChild(cssLink);

By default, we inject the contents of Widgets/InfoBox/InfoBoxDescription.css

You can also style outer InfoBox properties by overriding the CSS classes defined in Widgets/InfoBox/InfoBox.css in your own apps css file. I’m not sure if you’ll be able to add draggable support in this way, but you can do a bunch of other stuff.

If you want to replace the infoBox completely, then simply pass “infoBox: false” to the Viewer constructor. It’s then up to you to bring up your own widget when an entity is selected. The InfoBox simply displayed the content of the entity.description property. You could copy/paste the existing InfoBox code as a starting point.

http://www.html5rocks.com/en/tutorials/security/sandboxed-iframes/

Share